
How to Save a Wedding Bouquet: dry and preserve it
Air drying, pressing, silica gel, microwave drying, glycerin, wax dipping, professional freeze-drying and resin encapsulation, compared with real timelines and costs, plus the full step-by-step for drying it yourself.
How do you save a wedding bouquet?
Start within 24 to 48 hours of the wedding, before the flowers wilt. For a DIY result closest to fresh, bury the blooms in silica gel for 3 to 7 days. For the best overall result, ship or drop off the bouquet with a professional freeze-drying studio, which usually costs $150 to $600 and takes 6 to 12 weeks. Air drying, pressing, glycerin and wax dipping are cheaper but trade off color, shape or longevity.
The first 48 hours after your wedding
A cut bouquet has no water source once the reception ends, and most flowers start wilting fast. What you do in the first two days matters more than which method you pick.
- Same night
Stand the bouquet in water
Ask someone to put it in a vase with fresh water the moment the reception ends, even if you will start preserving it later.
- Within 24 hours
Choose your method
Decide DIY or professional now. A professional studio needs the bouquet shipped or dropped off fast, ideally overnight.
- By hour 48
Start drying or ship it
Begin silica gel, air drying or glycerin at home, or hand the bouquet to a courier for a freeze-drying studio.
- If you must wait a day
Refrigerate, do not freeze
A home refrigerator slows wilting for a day or two. A home freezer will not preserve the flower and can ruin it for later drying.
Ways to save a bouquet, compared
Eight methods, from a free afternoon project to a professional studio piece. Time and cost ranges below reflect a full bridal bouquet, not a single stem.
| Method | Time | Cost | Look | Best for |
|---|---|---|---|---|
| Air drying | 2 to 4 weeks | $0 to $15 | Muted color, shrinks | Sturdy stems, tight budget |
| Pressing | 1 to 4 weeks | $0 to $30 | Flat, 2D, deep color | Frames, cards, thin flowers |
| Silica gel | 3 to 7 days | $20 to $45 | Closest DIY match to fresh | The full bouquet, best DIY result |
| Microwave + silica | 1 to 5 minutes | $20 to $45 | Good, some risk of scorching | A fast test bloom, not the whole bouquet |
| Glycerin | 2 to 6 weeks | $5 to $15 | Soft and pliable, darkens | Greenery and foliage |
| Wax dipping | Same day | $10 to $25 | Glossy, fresh for weeks | A quick keepsake, not archival |
| Professional freeze-drying | 6 to 12 weeks | $150 to $600 | 90 to 95% true to life | The whole bouquet, best overall result |
| Resin encapsulation | Weeks, after drying | $150 to $900+ | Glossy, permanent, 3D | Jewelry, paperweights, ornaments |
Choose your method
Cost and effort at a glance, then a plain if/then for picking between them.
You want it to look almost exactly like your wedding day and do not mind paying for it
Professional freeze-dryingYou want the best DIY color and shape match without shipping your bouquet anywhere
Silica gelYou want the cheapest option and are fine with a flat, 2D result
PressingYou mostly care about the greenery and foliage, not the blooms
GlycerinYou want a keepsake you can wear or set on a desk
Resin encapsulation, after dryingYou want something ready today for a photo or a thank-you card, not forever
Wax dippingAir drying, the free option
The oldest method, and still the cheapest. It trades bright color for almost no cost or equipment.
- Step 1
Strip leaves off the lower two-thirds of each stem so nothing sits against damp foliage.
- Step 2
Split the bouquet into small bunches of 3 to 5 stems and wrap the stems with a rubber band, which tightens as they shrink.
- Step 3
Hang each bunch upside down somewhere dark, dry and ventilated. Light fades color fast.
- Step 4
Leave for 2 to 4 weeks. Stems should snap, not bend, when fully dry.
Silica gel, the best DIY result
Silica gel crystals pull moisture out of a flower fast while it is held in place, so it keeps its shape and most of its color. First Day of Home walks through the full process, which we follow below ( ), and general extension horticulture guides such as
First Day of Home's silica gel guide and general drying reference material from the University of Wisconsin-Madison Extension cover the same core steps.
- 1
Photograph the bouquet
Take a clear photo before you take anything apart. You will use it to rebuild the arrangement later.
- 2
Deconstruct the bouquet
Separate every bloom from the greenery and trim each stem to about an inch, so each flower dries as its own piece.
- 3
Pour a base layer
Add 1 to 2 inches of silica gel crystals into an airtight container.
- 4
Position the flowers
Set the blooms face up with space between them so petals do not touch.
- 5
Bury completely
Slowly pour more crystals over and between every petal until the flower is fully covered and supported.
- 6
Seal and wait
Close the container and leave it for 3 to 7 days. Flowers with thick centers, like garden roses, can take closer to two weeks.
- 7
Uncover and reassemble
Gently tip out the crystals, brush off any residue with a soft brush, and rebuild the bouquet using your photo as the guide.
Preserve Flowers the BEST Way Possible! Use Silica Gel!
First Day of Home shows the full silica gel process on real flowers, from burying the blooms to brushing off the crystals once they are dry.
First Day of Home on YouTube, May 2023, 10:40Faster and slower options: microwave, pressing and glycerin
Three more DIY routes, each suited to a different flower or a different amount of patience.
Microwave plus silica gel (1 to 5 minutes)
- 1
Bury one test flower in silica gel inside a microwave-safe container, the same way as the standard silica method.
- 2
Place an open cup of water in the microwave alongside the container to stop the flower from overheating.
- 3
Microwave in 1-minute bursts on a low or medium setting, checking after each one.
- 4
Most single blooms finish in 1 to 5 minutes total. Let the container cool fully before opening it.
Best on a single test bloom, not the whole bouquet at once. Overheating can scorch petals.
Pressing (1 to 4 weeks)
- 1
Choose flat, thin flowers. Thick, layered blooms like garden roses do not press well.
- 2
Sandwich each flower between two sheets of parchment or blotting paper.
- 3
Place inside a flower press, or under heavy books, and add weight evenly.
- 4
Leave for 1 to 4 weeks, swapping the paper once a week if it feels damp.
Glycerin (2 to 6 weeks)
- 1
Mix 1 part glycerin to 2 parts warm water in a jar or vase.
- 2
Split or gently crush the bottom inch of each stem so it can draw up the solution.
- 3
Stand the stems in the solution somewhere cool and out of direct light.
- 4
Leave for 2 to 6 weeks. The stems and leaves will feel soft and pliable, and will darken in color as the glycerin replaces the water inside the plant.
Works best on foliage and sturdy greenery. Delicate petals tend to darken more than they preserve well.
Somebody is still uploading photos from the reception
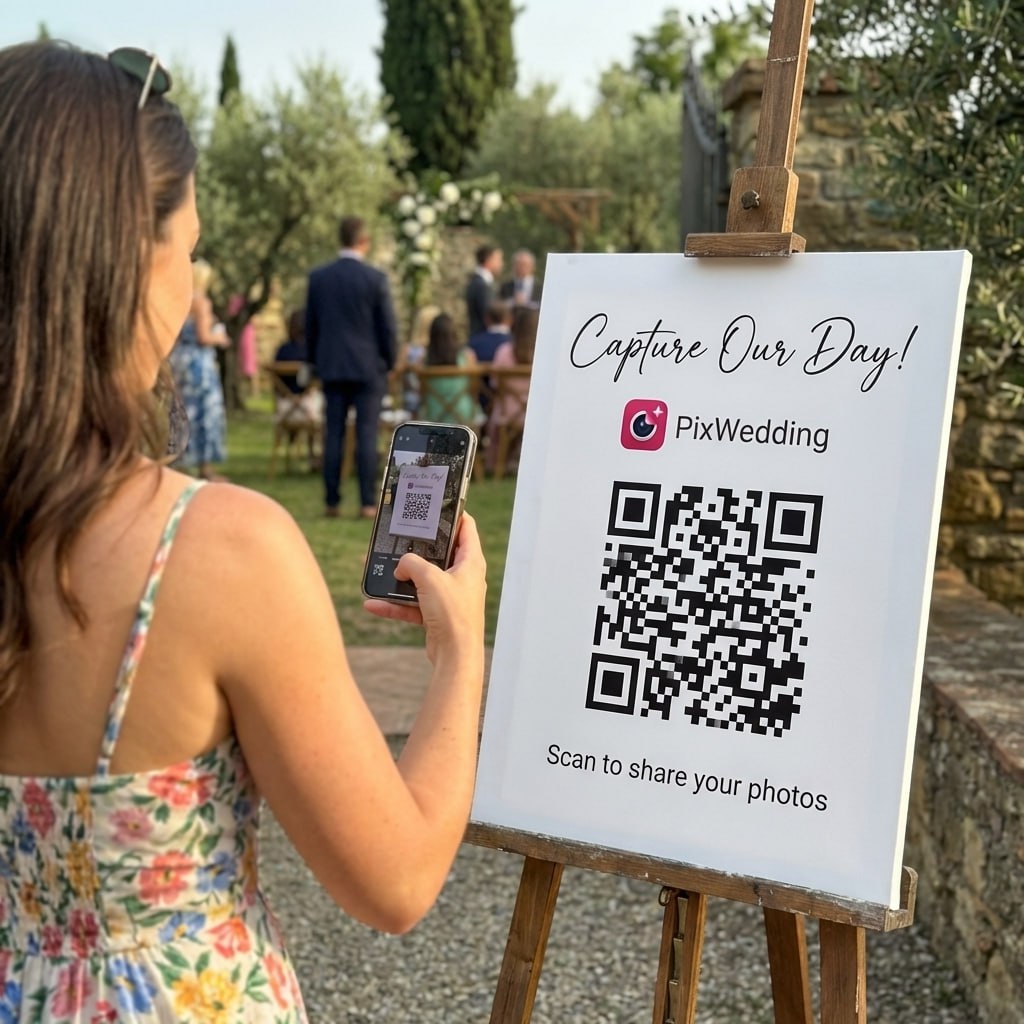
Guests keep taking photos for days after the wedding. A QR code on the tables means every one of those photos lands in one shared album, no app and no account needed.




Scan to join the album
No app, no account
UPLOADING
Saving your moment
THE ALBUM
Emma & Jack
June 21, 2026
647 photos · 95 guests


Professional freeze-drying, how it works
Freeze-drying delivers the most realistic result of any method because the flower loses moisture through sublimation, meaning the ice inside the cells turns straight into vapor without ever becoming liquid again, so the structure barely collapses.
- 1
Photograph and inventory
The studio photographs the bouquet and notes every stem before anything is touched.
- 2
Disassemble and pretreat
Flowers are taken apart and treated to help hold their shape and resist mold.
- 3
Flash-freeze
The blooms go into a specialized machine and are frozen to roughly -60°F.
- 4
Vacuum-dry over 10 to 14 days
A vacuum pump slowly pulls the frozen moisture out as vapor while the temperature rises in stages.
- 5
Reassemble and mount
The studio rebuilds the arrangement and mounts or boxes it for shipping back to you.
Turnaround varies a lot by studio and season. Confirm the current timeline before you book, especially if you are marrying during a busy fall wedding season.
Resin encapsulation and other professional keepsakes
Resin work almost always starts with flowers that are already pressed or freeze-dried. The dried material is arranged and sealed inside clear resin, creating a permanent, glossy piece instead of a delicate dried arrangement.
Cost
Typically $150 to $900 or more, depending on the size and complexity of the piece.
Added time
Usually several extra weeks on top of whichever drying method comes first.
Care
Some resins yellow over years without a UV-protective sealant or resin additive, so ask the studio what they use.
DIY vs professional
Both routes work. The right one depends on your budget, your timeline, and how close to the original you need the result to be.
DIY
- Costs $0 to $50 in materials for most methods
- You do the work over days to a few weeks
- Full control over when and how the flowers are handled
- Some risk of mold, breakage or uneven color if a step is rushed
- Best for smaller bouquets, tighter budgets, or a favorite handful of blooms
Professional
- Costs $150 to $900+ depending on method and piece
- Turnaround usually runs 6 to 12 weeks or more
- Highest color and shape fidelity, up to about 90 to 95%
- The studio handles shipping, pretreatment and mounting
- Best for a large bouquet or one you only want to preserve once
Which flowers preserve best (and which struggle)
Moisture content is the biggest factor. Low-moisture, sturdy flowers dry fast and hold their shape. High-moisture or paper-thin flowers need more care, or a gentler method like silica gel or professional freeze-drying.
Dries well
- Roses (most colors), which have enough structure to hold their shape in silica gel or air drying.
- Lavender and statice, which are already low in moisture and dry quickly with little shrinkage.
- Baby's breath, a classic filler that air-dries with almost no extra care.
- Eucalyptus and other sturdy greenery, which hold color well with glycerin.
Trickier to preserve
- Hydrangea, which holds a lot of water when freshly cut and can mold if it is not dried quickly with silica gel rather than slow air drying.
- Peonies, whose many overlapping petals can brown at the edges before the center finishes drying.
- Orchids, which are thin-petaled and bruise easily, making freeze-drying the safer route over pressing.
- Ranunculus, which is paper-thin and can shatter under the weight of a press.
- White flowers generally (white roses, white peonies), which tend to yellow or brown faster than colored varieties since there is no pigment to mask the natural browning.
For general reference on how moisture content affects drying, university extension horticulture programs such as the University of Wisconsin-Madison Extension publish flower-drying guides.
Common mistakes to avoid
Most preservation failures trace back to one of these six.
Waiting too long to start
A cut bouquet with no water source starts wilting within 24 to 48 hours. Decide your method before the wedding, not after.
Drying somewhere humid
A steamy bathroom or a kitchen near the stove invites mold. Pick a dry, ventilated room instead.
Not using enough silica gel
A petal touching open air inside the container will dry unevenly or wilt instead of crisping. Bury it completely.
Opening the container to peek
Every time you break the seal, moist air gets back in and resets part of the drying process.
Skipping a UV-protective sealant
Dried and resin-preserved flowers both fade faster in direct sunlight without a UV-protective spray or resin coating.
Using a home freezer instead of a professional freeze-dryer
A regular freezer does not reach the ultra-low temperatures or run the vacuum cycle that sublimation needs. Ice crystals form inside the cells and the flower turns to mush as it thaws.
Long-term care and keepsake ideas
A preserved bouquet is not maintenance-free. A few habits keep it looking right for decades instead of a few years, and you don't have to display the whole bouquet as one piece.
Keep it out of direct sun
UV light fades dried and pressed color faster than almost anything else. Display on a wall away from direct sunlight.
Keep humidity low
A small silica packet inside a display case or shadow box keeps stray moisture from softening dried petals again.
Handle the frame, not the flowers
Dried petals are brittle. Move the display by its base or frame, never by the blooms themselves.
Reseal if you move somewhere humid
Coastal or tropical humidity can undo years of dry storage. A resealed case or a fresh coat of sealant protects the piece.
Resin pendant or ring dish
A single petal or small bloom cast in clear resin, small enough to wear or set on a nightstand.
Framed shadow box
Pressed flowers paired with the invitation, a ceremony program, or a scrap of the dress fabric.
Resin paperweight or coaster set
Petals from the whole bouquet spread across a set instead of concentrated in one piece.
Holiday ornament
A small dried or pressed cluster inside a clear glass or resin ornament, used every year after.
Memory jar
Loose dried petals layered in a sealed glass jar, the lowest-effort keepsake on this list.
Anniversary card insert
A few pressed petals sealed under a laminate sheet inside a card for your first anniversary.
Other wedding-day flowers worth preserving
The bouquet is rarely the only floral piece from the day worth keeping.
The boutonniere
A single stem is one of the easiest things to preserve. Press it flat or dry it in silica gel in just a few days since there is so little material to work with.
A few stems from the ceremony arch
If you loved the ceremony florals, ask a bridesmaid or family member to pull a handful of stems before breakdown. Larger arrangements are usually discarded or donated right after the event.
The toss bouquet, if you had one
Many couples order a smaller, separate toss bouquet specifically so the real bouquet can go straight into preservation without being handled or thrown.
Petals from the aisle or send-off
Loose petals can air dry flat on a towel in a day or two, then go into a memory jar, a shadow box border, or a preserved arrangement.
A short glossary
The words that show up most often when you're comparing preservation quotes and guides.
Sublimation
The process a professional freeze-dryer uses: ice inside the flower turns straight into vapor without passing through a liquid stage, so the plant's structure barely shrinks.
Conditioning
Giving fresh flowers a few hours in clean water before drying, so they are as hydrated and firm as possible when the process starts.
Desiccant
A moisture-absorbing material, most often silica gel crystals, used to pull water out of a flower while it holds its shape.
Encapsulation
Sealing a dried or pressed flower inside clear resin, creating a permanent, glossy, 3D keepsake.
UV-protective sealant
A spray or resin additive that slows color fading from sunlight exposure.
Shadow box
A deep-set picture frame used to display dried or pressed flowers along with small keepsakes, without pressing them flat against glass.
Scan. Upload.
Every candid from the day.
Your bouquet takes weeks to preserve. Your guests' photos disappear from their phones within days unless you collect them. Watch how a guest scans the QR code and adds photos and videos from the phone browser in seconds, with no app and no account.
WEDDING ALBUM
Maya & Leo
Example album




The bouquet toss
Caught it!!
Save the flowers and the photos that go with them
Your preserved bouquet tells the story of the day, but so do the hundreds of candid shots your guests took. Collect all of them in one shared album before they disappear. The first 20 uploads are free, no card.
From the bridesmaids
Scan to join the album
No app, no account
UPLOADING
Saving your moment
THE ALBUM
Maya & Leo
Example album
647 photos · 95 guests
SCAN TO TRY
pix.wedding/
your-wedding
More flower guides and free tools
This page is about saving the bouquet you already have. These cover the rest of your wedding flowers and the rest of your planning.
How to save a wedding bouquet in five lines
If you remember five things about preserving your bouquet:
- Start within 24 to 48 hours, before the flowers wilt
- Silica gel gives the best DIY color and shape match, in 3 to 7 days
- Professional freeze-drying gives the best overall result, for $150 to $600 and 6 to 12 weeks
- Sturdy, low-moisture flowers like roses and lavender preserve easiest
- A UV-protective sealant or resin coating is what keeps the color from fading afterward
Preserving flowers beyond the bridal bouquet
The bridal bouquet gets the most attention, but boutonnieres, toss bouquets, ceremony arch stems and loose aisle petals all preserve the same ways, usually with less time and effort since there is less material to work with.
Explore more free wedding tools
Everything you need to make your wedding day stress-free and unforgettable.
QR Sticker Designer
Design custom print-ready stickers.
Hashtag Generator
Create unique wedding hashtags.
How to Collect Guest Photos
5 methods ranked by participation rate and ease.
Share Wedding Photos with Guests
Compare every sharing platform by ease and participation.
Best Way to Get Guest Photos
The single method with the highest participation rate.
How to Make a Shared Wedding Album
Step-by-step setup for every platform.
Alternative to Disposable Cameras
Better, cheaper options than disposable cameras.
Alternative to Wedding Photo Booth
5 cheaper alternatives to a $1,000+ photo booth rental.
Questions about saving a wedding bouquet
Timing, cost, DIY methods and which flowers hold up best: short answers with sources.
Start within 24 to 48 hours if you can. A cut bouquet has no water source once the day ends, and most flowers begin wilting fast. If you cannot start right away, stand the stems in water and keep the bouquet somewhere cool, ideally refrigerated, for a day or two at most.
Air drying and pressing are the cheapest, often costing nothing beyond a rubber band or some heavy books. Silica gel costs more up front for the crystals and a container, but the crystals are reusable for future projects and give a noticeably better result.
Professional freeze-drying most often runs $150 to $600 depending on bouquet size and any display case or mounting you add. Resin encapsulation pieces, usually made from flowers that are pressed or freeze-dried first, typically run $150 to $900 or more depending on the size and complexity of the piece.
The freezing and vacuum-drying inside the machine takes roughly 10 to 14 days, but total turnaround to get your bouquet back commonly runs 6 to 12 weeks, since studios also photograph, pretreat, reassemble and mount the piece, and many get backed up during peak wedding season. Ask your studio for their current turnaround before you book.
Yes. Deconstruct the bouquet, bury each bloom in silica gel crystals inside an airtight container, and leave it sealed for 3 to 7 days, longer for thick-centered flowers. It is the DIY method that keeps color and shape closest to how the bouquet looked on the day.
Sturdy, low-moisture flowers like roses, lavender, statice and baby's breath preserve most reliably. Thin-petaled or high-moisture flowers like orchids, ranunculus, peonies and fresh hydrangea take more care and are often better suited to silica gel or professional freeze-drying than slow air drying.
Yes, and many couples do. You do not need to preserve every stem. Pulling out a favorite handful of blooms for silica gel or pressing, while letting the rest go, is common and keeps the cost and effort down.
It depends on how close to the original you want the result and how much time you have. DIY methods cost very little and give you full control, but professional freeze-drying keeps the most realistic color, shape and texture if the bouquet is the one keepsake you want to get exactly right.