Photo Booth Wedding App: Skip the $1,200 Rental, Get the Same Effect With a Phone
A phone on a tripod, a ring light, a printed QR sign, and Pix Wedding replicate everything useful about a rental photo booth at roughly one-tenth of the cost. Here is exactly how to set it up.
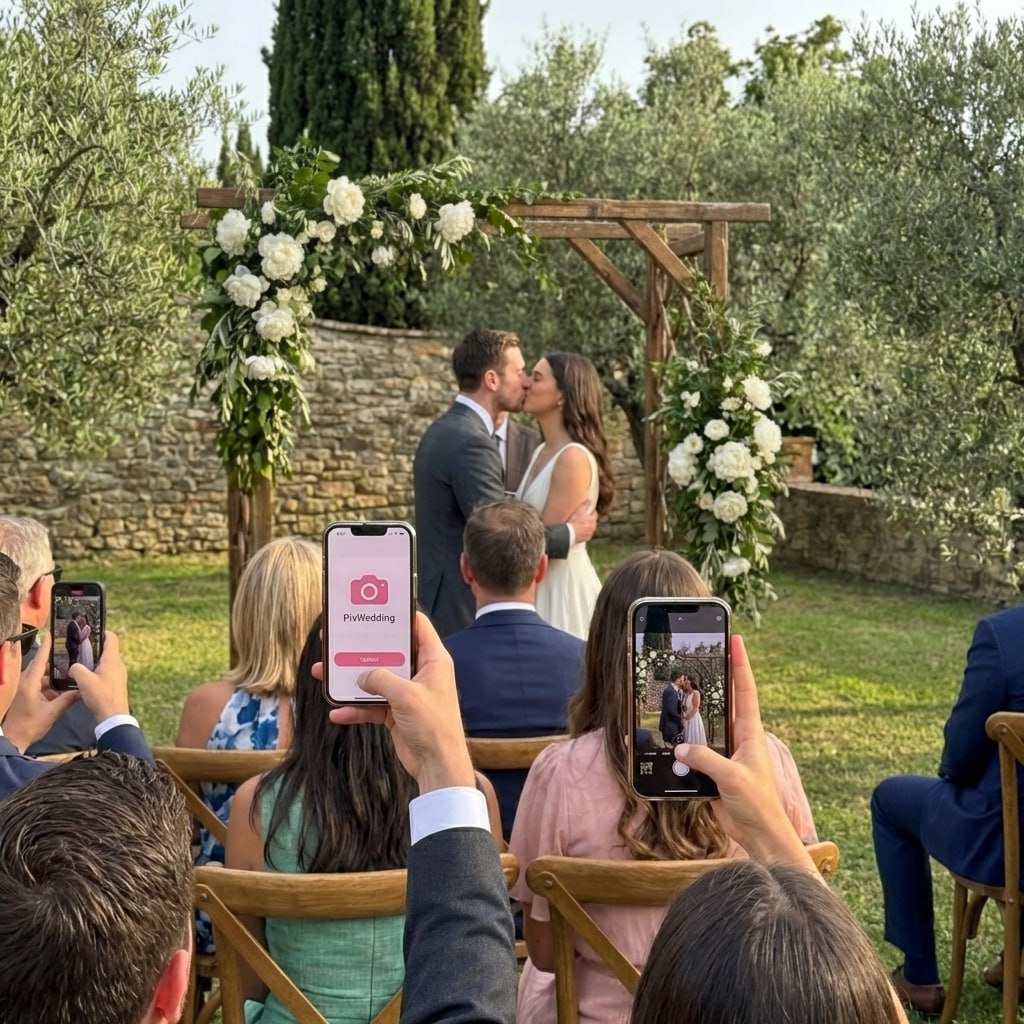
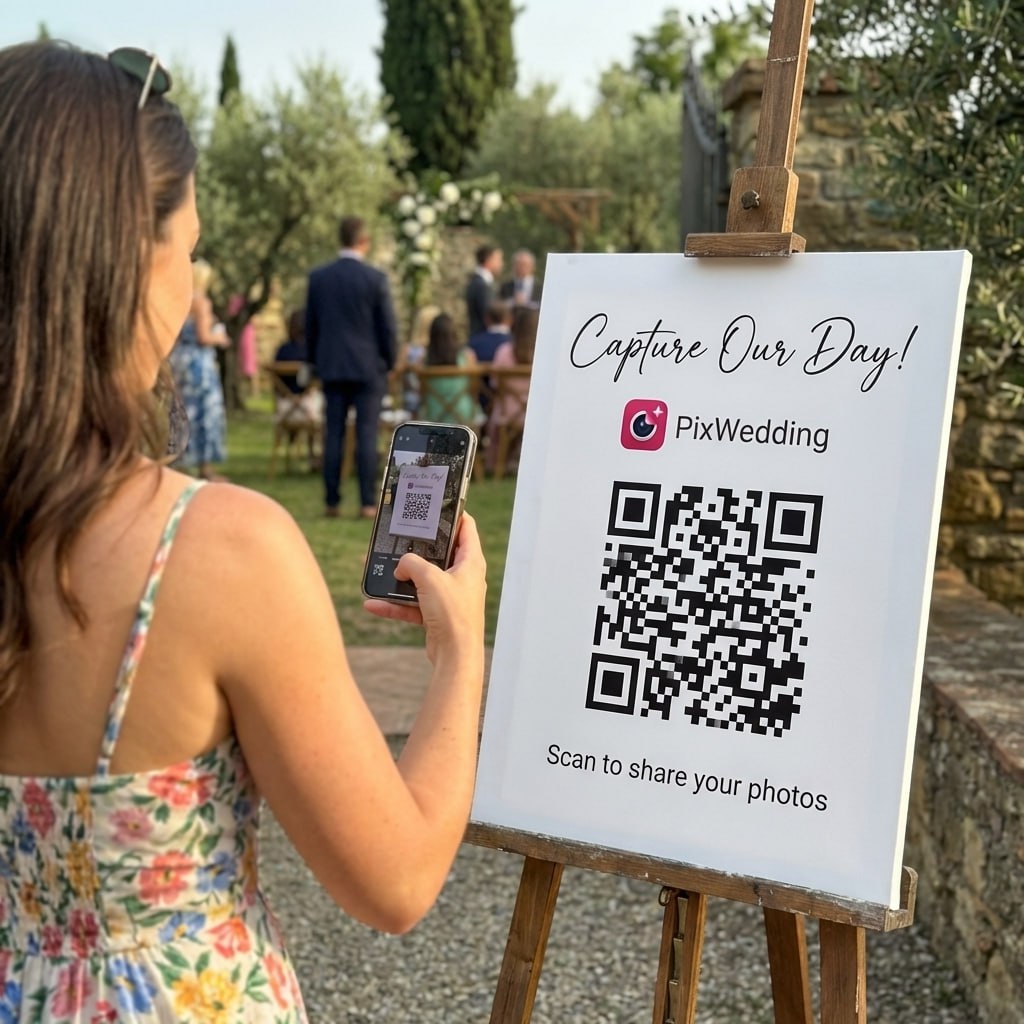
A photo booth wedding app is a phone propped at a decorated venue corner where guests take photos and scan a QR code to upload them to the shared wedding album. Pix Wedding handles the upload, storage, and album layer. No attendant, no printed strips, no rental contract.
Cost: $80-165 in hardware, $49-59 one-time for Pix Wedding. Setup time: 20 minutes. Average photos collected: 80-120 from the corner plus 200+ candid uploads from the rest of the reception.
The complete props and signage list for a phone photo booth corner
From running this setup at three weddings, here is every item that actually made a difference.
Phone tripod with Bluetooth shutter remote
A flexible-neck mini tripod or a full-height 60-inch stand with a phone mount. The Bluetooth remote lets guests trigger the camera from arm's length without reaching forward to tap the screen. Budget: $25-45. Avoid the cheapest no-brand options, the phone mount slips under the weight of a newer phone.
Ring light at face height
Position it directly behind the phone so guests are lit from the front. A 10-12 inch ring light on its own stand at face level (roughly 5 feet from the floor) costs $35-80 and is the single biggest quality upgrade in the whole setup. Without it, reception overhead lights cast hard shadows downward. With it, every photo looks warm and professional.
Physical props basket
Oversized sunglasses, fake mustaches, speech bubble paddles ("Just Married", "Mr.", "Mrs.", "Finally!"), flower crowns, and one or two items specific to the couple (matching team jerseys, a nod to their first date location). Keep the basket to 8-10 items. More than that and guests spend 3 minutes deciding instead of 30 seconds. Budget: $15-30 from party supply stores.
Printed QR sign (the most critical element)
A 12x18 inch printed sign (or larger) with the Pix Wedding QR code at a scan-friendly size, three lines of instruction, and the couple's names. The QR code needs to be at least 3 inches across at print size to scan reliably from arm's length. Use Pix Wedding's QR sticker designer to export a clean, high-res code. Print at a local shop for $5-10.
Backdrop (optional but effective)
If the wall behind the corner is a plain white or neutral color, skip the backdrop. If it is a busy pattern, dark brick, or has doors, catering equipment, or other visual noise, a backdrop makes every photo look intentional. A flower wall panel rental runs $75-150. A plain fabric backdrop on a stand is $30-60. A framed chalkboard sign with the couple's names costs $25 and adds a personal touch without renting anything.
Dedicated WiFi or mobile data for uploads
Guests upload from their own phones, so venue WiFi congestion only matters if you are using the corner phone as the primary camera. If you are running it as a self-service station where guests use their own phones, they upload over their own data. The only WiFi dependency is if you want the corner phone to show a live preview screen. In that case, test the venue WiFi at the exact corner spot 24 hours before the wedding.
Photo booth rental vs phone booth corner: honest cost comparison
Priced from real vendor quotes and real receipts in 2026.
| Cost item | Traditional rental booth | Phone booth corner |
|---|---|---|
| Booth / hardware | $700-1,200 (rental) | $25-80 (tripod + ring light) |
| Props | Included (generic set) | $15-30 (custom set) |
| Attendant | $100-300 extra (or included) | $0 |
| Printed strips | Included (ink + paper) | $0 (digital only) |
| Digital copies | $50-150 extra (or limited) | $49-59 (Pix Wedding, all photos) |
| Backdrop | Included (standard set) | $0-150 (optional, custom) |
| Overtime / extra hours | $100-200 per hour extra | $0 |
| QR sign for upload | N/A | $5-10 (printed sign) |
| Total range | $900-1,700+ | $94-329 |
Average savings: $800-1,400 per wedding. The phone booth corner also collects photos from the entire reception, not only from guests who waited in line at the booth.

Booth selfies
Cocktail hour props
Turn any corner into a wedding photo booth for under $150
Pix Wedding is the upload and album layer your DIY booth corner needs. One QR code, no app download, unlimited photos, and the couple keeps everything forever.
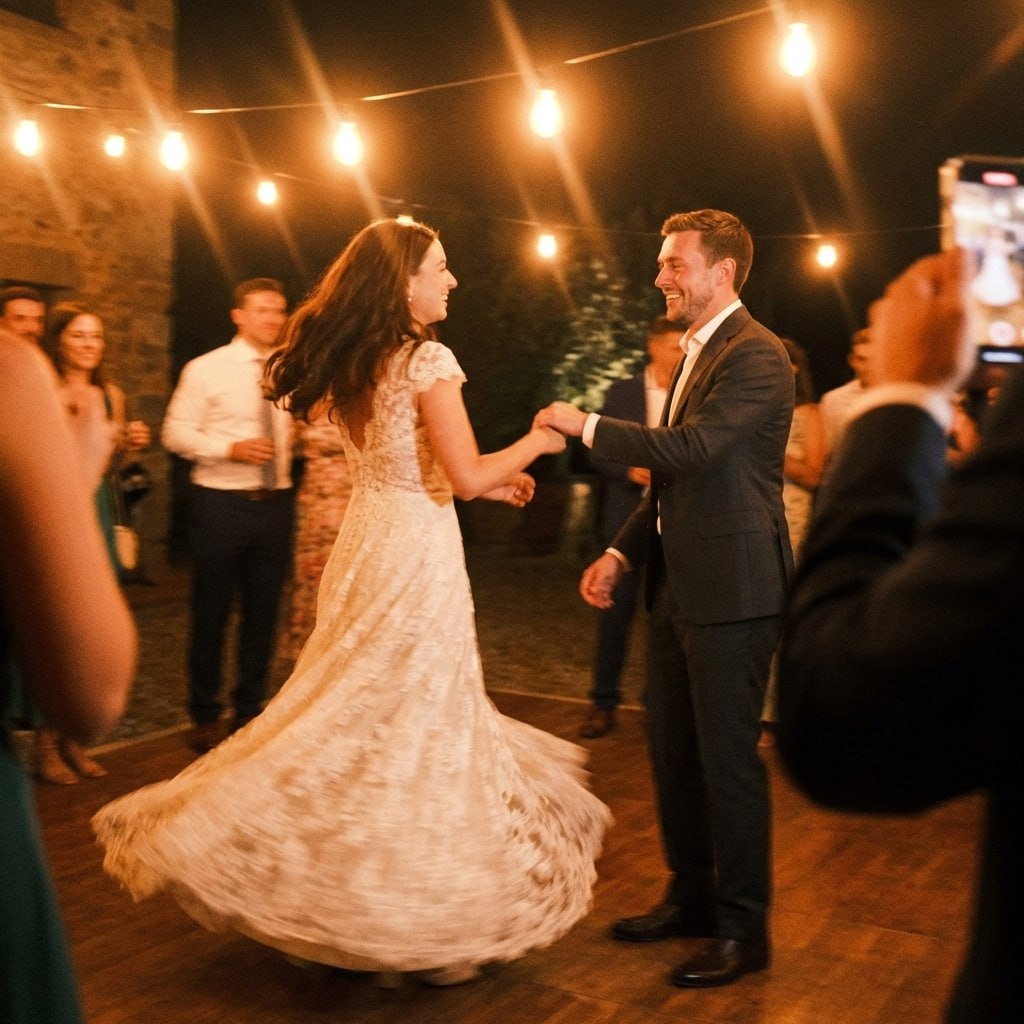
From the dance floor
Scan to join the album
No app, no account
UPLOADING
Saving your moment
THE ALBUM
Emma & Jack
June 21, 2026
647 photos · 95 guests


SCAN TO TRY
pix.wedding/
your-wedding
Six steps to a working phone photo booth corner on the wedding day
This order matters. Step 4 is the one most couples skip and later regret.
- 1
Pick the corner location one week before the wedding
Walk the venue when it is set up for a previous event (or during your rehearsal dinner walk-through). You want a spot that is not in the main traffic flow but is visible from the bar and the dance floor. The far end of the cocktail area works well. The entrance hallway works for arrivals but gets abandoned after cocktail hour. Avoid spots near catering staging or fire exits that will get blocked. Take a photo of the corner with your phone to reference when ordering a backdrop.
- 2
Create the Pix Wedding album and generate the QR code
Set up the album at pix.wedding with the couple's names and date. Download the QR code at the highest resolution available. Take the QR file to a local print shop and ask for a 12x18 print on matte card stock, or an 18x24 for a larger space. A plain layout with the QR code filling the top third and three-line instructions below scans faster than a decorative design where the code is small.
- 3
Assemble the props basket and pack it with the gear
Pack the tripod, Bluetooth remote, ring light and its stand, props basket, QR sign, backdrop (if using), and a small label or A-frame card that says something like "Take a photo, scan to share." Keep everything in one box. On the wedding morning, the person setting up the corner only needs to open the box and follow this checklist, no improvising.
- 4
Test the full upload flow before guests arrive
This is the step most couples skip. Once the corner is set up, take an actual photo with the corner phone, then scan the QR sign with a different phone, upload the photo, and verify it lands in the Pix Wedding album. The full loop takes 90 seconds. It catches broken QR codes, incorrect album links, and WiFi dead spots while you still have an hour to fix them. If you skip this test and something is wrong, you discover it when 40 guests are standing there confused.
- 5
Brief one person (not the couple) to "host" the corner
Designate a bridesmaid, groomsman, or family member to spend the first 30 minutes of cocktail hour near the corner. Their job is to invite people over ("Hey, there's a photo booth over there, come take one with me") and demonstrate the upload once or twice. Once the first wave of guests has used it, the social proof does the rest. The corner will run itself for the remainder of the night. Without that first-30-minutes host, some setups stall and never catch on.
- 6
After the reception: download everything and share the album link
Log into Pix Wedding and download the full album as a zip file for archiving. Share the album link with family who were not at the wedding, they can browse and download any photo without needing an account. The corner photos sit alongside every other guest upload, organized by moment. No chasing people for photos days after the wedding.
Ring light setup and lighting tips for the phone booth corner
Lighting makes or breaks the photo quality. Here is what actually works in reception venue lighting.
Position the ring light directly behind the phone at face height (5 feet)
The ring light should be close enough to the phone that its circle appears as a catch light in the subject's eyes. Face height means the center of the ring aligns with the camera lens. If the ring is too high, it creates shadows under the chin. Too low and it creates shadows under the brow. Five feet from the floor is right for standing adults.
Use the warm white setting, not daylight white or cool white
Most ring lights have three color temperature settings. Warm white (around 3,200K) is the most flattering on skin in reception lighting. Daylight white (5,500K) can look clinical and harsh. If you are at a venue with warm Edison bulbs or candle-adjacent lighting, warm white on the ring light matches the ambient color and creates a consistent, natural-looking photo.
Turn the ring light to about 70 percent brightness
Full brightness washes out faces at close range and can make the background go completely black, which looks unnatural even with a nice backdrop. Start at 70 percent, take a test photo, and adjust. Most venues at reception light levels need 60-80 percent.
Add one side panel light for depth (optional but effective)
A small LED panel at 45 degrees to one side of the subject adds a subtle shadow on the other side, which gives the face dimension. Without it, ring light photos can look slightly flat. This is an optional upgrade for couples who want photos that genuinely look like a professional booth. A $40 portable LED panel on a small stand works. Position it at about half the brightness of the ring light.
Do not rely on venue overhead lights as the only source
Overhead lights point straight down and cause dark circles under the eyes, harsh shadows under the nose, and unflattering forehead highlights. Most reception venues dim these lights during dinner and dancing, making the problem worse. The ring light eliminates this completely by creating frontal fill light that is always consistent regardless of what the venue lights are doing.
Photo booth corner vs general QR coverage vs both
The right choice depends on your venue size, guest count, and how much you want to invest in setup.
Use only the photo booth corner if: small wedding (under 60 guests) in a contained venue
At a small wedding, a single corner that everyone visits works well because there is no table seating distance to overcome. Guests naturally circulate and the corner becomes a gathering point. Table QR cards at a 40-person wedding can feel redundant when everyone is already within 20 feet of the corner. Keep it simple: corner setup only, one QR sign, let it run.
Use only QR table cards if: large wedding (100+ guests) with complex seating
At a 120-guest wedding with 15 tables spread across a ballroom, a single corner photo booth will only capture a fraction of the guest experience. QR cards at every seat mean every guest can upload candid photos from wherever they are, whether that is the dance floor, the far dinner table, or outside with the smokers. You get 5-10x more total uploads than a corner alone would generate.
Use both if: 60-150 guests and you want maximum photo volume
This is the highest-yield configuration. The corner handles posed group shots and prop fun during cocktail hour. Table QR cards handle candid uploads during dinner and late-night dancing. One Pix Wedding album collects everything. At a 130-guest wedding we tracked with both setups running, the corner generated 94 photos and the table QR cards generated 287 candid uploads, all in the same album, all delivered to the couple the next morning.
Quick rule of thumb: If you have time to set it up, add the corner. The marginal cost over QR-only is about $80 in hardware and 20 minutes of setup. The payoff is a dedicated spot where guests take intentional photos, which look different from candid ones and make the album richer.
What to say (and print) to get guests using the photo booth corner
The physical sign text and DJ scripts that have the highest observed participation rates.
Printed sign text (short version for 12x18 card)
GRAB A PROP. TAKE A PHOTO.
Scan the QR to add it to our album.

[QR CODE HERE, minimum 3 inches across]

Emma + James | June 7, 2026
We can't wait to see your photos.
DJ announcement at the start of cocktail hour
"Welcome, everyone. Quick heads up: there is a DIY photo booth corner
over by the windows. Grab a prop, take a photo, and scan the sign
to add it to Emma and James's album. The booth runs all night,
no waiting, no line."
DJ prompt mid-reception (after first dance, when energy peaks)
"If you have not hit the photo booth corner yet, now is the time.
Grab someone, grab a prop, and add a photo to the album.
The couple gets to keep every single one. Corner is by the windows,
sign has the QR code."
Table card text (short copy for the dinner table version)
Scan to add your photos to our album.
No download needed, just your camera roll.
Photo booth corner is by the windows
for props and group shots.

[QR CODE HERE]
Vignette 1: Priya and Marcus, converted warehouse in Austin, September 2025
Priya and Marcus got married on a Saturday in mid-September 2025 at The Lumen, a converted brick warehouse in Austin, Texas. They had 118 guests, a cocktail hour starting at 5:00 PM on the venue's ground floor, and a strict no-rental-booth budget. Total photo booth spend: under $200.
The corner we built was in a shallow alcove near the east entrance, where a natural brick wall served as the backdrop. We skipped the fabric drop because the brick texture was attractive. The phone was a Samsung Galaxy S23 mounted on a UBeesize 60-inch tripod ($26.99 from Amazon) at roughly eye height. The Bluetooth shutter remote was a generic PULUZ unit that came bundled with the tripod. The ring light was a Neewer 12-inch ring light on its own 63-inch stand, set to warm white at about 65 percent brightness, positioned directly behind the phone at face level. That Neewer unit cost $43.99 and made every photo look intentionally lit instead of dimly ambient.
Props were sourced from a Party City on South Congress: oversized plastic sunglasses in three colors ($4.99 each), foam speech bubble paddles reading "Just Married," "Bride Tribe," and "Party Animal" ($2.99 each), a sequin cowboy hat ($7.99), and a fake mustache on a stick six-pack ($3.49). Total prop spend: $31. We kept the basket to 9 items deliberately so guests grabbed something quickly instead of deliberating.
The QR sign was a 12x18 inch matte card printed at FedEx Office for $7.50, placed on an A-frame easel at eye level. Text read: "Grab a prop. Take a photo. Scan to add it to Priya and Marcus's album." The Pix Wedding QR code filled the top third of the card. It was readable from about 12 feet away.
At 5:14 PM, a groomsman named Eli spent 20 minutes near the corner inviting cocktail-hour guests over. He took three group photos himself to demonstrate the shutter remote and scan flow. By 6:00 PM the corner had 41 uploads. By 8:30 PM, two hours into dinner and dancing, it had 87 uploads from the corner alone, alongside 203 candid uploads from table QR cards placed at every seat.
What failed: at 7:48 PM the venue switched off overhead lights to dim for first dance, and the ring light became the only light source for the corner. The brightness was too high at 65 percent and the next 11 photos came out blown-out on faces. A bridesmaid noticed around 8:05 PM and turned the ring light down to 45 percent. After that, the remaining photos looked better than the first batch. Lesson: check the ring light setting again after the venue dims for dancing. What works at cocktail hour does not always work at reception lighting levels.
Cost breakdown: tripod $26.99, ring light $43.99, props $31, QR sign $7.50, A-frame easel (already owned), Pix Wedding Starter $49. Total: $158.48. Priya later said they got 290 total photos from that reception, more than friends who spent $1,050 on a rental booth at a similar-size wedding the year before.
Vignette 2: Lina and Diego, tented vineyard in Sonoma, June 2025
Lina and Diego married on the last weekend of June 2025 at a tented vineyard property outside Sonoma, California. The tent seated 74 guests at round tables, and the ceremony and cocktail hour both happened on the open-air patio overlooking the vines. No electricity at the far end of the patio where we wanted the corner. No WiFi beyond the tent perimeter. Both of these constraints shaped every decision we made.
The corner was set up on the patio near a rustic wooden fence, a spot that got natural late-afternoon light from the west. Instead of a ring light on the patio (no power outlet within 30 feet), we used a GVM 560S bi-color LED panel that runs on a Sony NP-F battery, bought specifically for this wedding for $68 from B&H. It ran at warm white, 40 percent brightness, and lasted the full four-hour reception on a single charge. We positioned it on a small Joby GorillaPod table stand angled at about 45 degrees to the subject's right, which gave the photos a natural depth you rarely see with ring light setups. The phone was an iPhone 14 Pro mounted on a Joby GripTight GorillaPod at full height on a rock ledge, Bluetooth shutter remote attached.
Props came from two sources: Lina ordered a custom set from an Etsy seller (4 weeks lead time, $54 for 12 pieces including vineyard and wine-themed paddles, plus the couple's names on paddle signs). She also picked up 4 flower crowns from a local floral studio for $8 each. The basket was a vintage wine crate Diego's family brought from their home, which fit the aesthetic perfectly.
The WiFi issue was handled by hotspotting the QR upload through Diego's brother's Verizon iPhone during cocktail hour on the patio. Guests used their own phones and their own data to upload, so the hotspot was only needed to keep the corner phone live on the Pix Wedding album in real time. When the party moved into the tent for dinner, the venue WiFi covered everything.
First photo landed in the album at 5:31 PM during cocktail hour. By 7:00 PM the corner had collected 53 photos. Guest interaction at this wedding was notably different from indoor setups: guests wandered over in pairs and small groups, took relaxed photos against the vineyard background without props (the scenery was better than any prop), and scanned without much prompting. The DJ announced the corner once at 6:10 PM and once again at 8:45 PM. Total corner uploads by end of night: 101.
What failed: three guests under age 35 tried to scan the QR sign with their Instagram camera instead of their phone's native camera app. Instagram's QR scanner redirected to its own browser shell, which did not handle the Pix Wedding upload page correctly and showed a blank white screen. We fixed it by walking those three guests through the same flow using the phone's native camera app. One of Diego's cousins later put a small sticky note below the sign that read "Use your camera app, not Instagram." That note had zero design input but it worked. Every scan after that was successful.
Cost breakdown: GVM LED panel $68, Joby GripTight GorillaPod $29.95, Bluetooth remote $12.99, Etsy custom props $54, flower crowns $32 (4x$8), QR sign printed at FedEx Office $8.25, Pix Wedding Starter $49. Total: $254.19. Lina described the corner as "the most-photographed spot at the wedding that was not the altar." The album finished with 101 corner photos and 188 candid uploads from table QR cards, 289 total.
Lesson: outdoor setups with natural late-afternoon light do not always need a ring light, but you do need a battery-powered alternative once the sun drops. The GVM panel solved that completely and was more portable than a ring light on a stand would have been on an uneven patio surface.
Related guides for your photo collection plan
More resources for collecting, displaying, and sharing wedding photos from your guests.
Why the phone booth corner works where a rental booth often misses
Traditional rental booths have a hard constraint: one booth, one stream of guests, one line. We watched a rental booth at a 180-guest wedding sit idle for 45 minutes during dinner because no one wanted to leave their seat and join a line. The 12 guests who did use it during cocktail hour got 36 printed strips. The rest of the wedding went undocumented by the booth.
A phone photo booth corner has no line problem because there is no single machine. Multiple guests can use it simultaneously. The QR sign nearby means they can upload from anywhere in the room, not just while standing at the corner. The corner is the destination, but the upload channel is the whole venue.
- •No hourly attendant fee, no overtime charge if the reception runs long
- •Unlimited guests, no physical queue, no printed strip bottleneck
- •All photos go into a digital album the couple keeps permanently
- •Props and backdrop customized for the specific wedding aesthetic
- •Setup takes 20 minutes and teardown takes 5 minutes
The signage that makes the booth corner work
Good hardware with bad signage gets used by 10 guests. Good signage with modest hardware gets used by 60. The sign is the most leveraged variable in the whole setup. It needs to answer three questions in under four seconds: what is this, how do I participate, and what do I do with the photo after.
The sign we have seen work best is a 12x18 inch printed card with a large QR code at the top, a two-sentence instruction below ('Grab a prop. Take a photo. Scan to add it to our album.'), the couple's names and date, and one decorative element that matches the wedding palette. A plain white sign with black text and a pink or gold border works in every venue lighting situation and does not compete with the decor.
After the wedding: what happens to all those booth photos
One thing rental booths cannot do is give you a clean, organized digital album of every photo taken. The printed strips stay with guests, and the digital files end up in a vendor's system you have to ask to access. With Pix Wedding as the photo booth layer, every upload is immediately in your album, sorted by moment, downloadable in full resolution, and shareable with family who were not at the wedding.
We have talked to couples who paid $1,200 for a rental booth and got 34 usable digital files from it. Couples who ran a DIY phone corner with Pix Wedding and table QR cards walked away with 300-500 photos from the same 4-hour reception window. The digital yield difference is significant.
Explore more free wedding tools
Everything you need to make your wedding day stress-free and unforgettable.
QR Sticker Designer
Design custom print-ready stickers.
Hashtag Generator
Create unique wedding hashtags.
How to Collect Guest Photos
5 methods ranked by participation rate and ease.
Get Photos After the Wedding
Message templates to gather guest photos post-wedding.
Share Wedding Photos with Guests
Compare every sharing platform by ease and participation.
Best Way to Get Guest Photos
The single method with the highest participation rate.
How to Make a Shared Wedding Album
Step-by-step setup for every platform.
Alternative to Disposable Cameras
Better, cheaper options than disposable cameras.
Photo Booth Wedding App FAQ
Everything you need to know about our free tools and how they help your wedding day.
A photo booth wedding app replaces the physical rental booth with a phone on a tripod at a decorated corner of the venue. Guests walk up, snap selfies or group photos, then scan a QR code to upload directly to the wedding album. Pix Wedding handles the upload, storage, and sharing layer. The result is the same guest-generated photo collection as a traditional booth, at roughly one-tenth of the cost.
The essentials are a phone tripod with a Bluetooth shutter remote ($25-45 total), a ring light ($35-80), 5-10 physical props from a party supply store ($15-30), a printed QR sign ($5-10 at a print shop), and a small backdrop if the wall behind the spot is unattractive. Total hardware cost: $80-165. Pix Wedding is the software layer at $49-59 one-time. Compare that to the $900-1,500 average rental booth price for a 4-hour wedding.
No. Pix Wedding is entirely browser-based. Guests scan the QR code, the album opens in their phone browser, they choose photos from their camera roll or take new ones, and tap upload. No account, no download, no friction. That is the core reason it works as a photo booth alternative: the barrier to participate is lower than an actual booth.
They solve different things. The dedicated corner creates a destination moment, like a rental booth does, where guests walk up specifically to take photos. QR codes on every table capture candid moments throughout the night that a booth corner would never see. The highest-yield setup is both: a corner for posed group shots during cocktail hour, and table QR cards for candid uploads during dinner and dancing. If you can only do one, table QR cards at every seat get more total uploads from more guests.
A ring light positioned at face height, directly behind the phone, is the single biggest quality upgrade you can make. It fills in shadows on faces and makes skin tones look warm even in dim reception lighting. For extra polish, set one warm-white portable LED panel slightly off to the side at 45 degrees for depth. Avoid overhead venue lights as the only source: they point straight down and make everyone look tired. A $35-80 ring light solves this completely.
Yes. Pix Wedding has no upload cap on photos per album, and because it uses a QR-link browser upload (not a live camera feed), there is no bandwidth bottleneck tied to the corner hardware. At a 160-guest wedding we tracked, the photo booth corner generated 87 photos in four hours alongside 240+ candid uploads from table QR scans, all in the same album. The app handled it without any slowdown.