Low Budget DIY Wedding Backdrop: 12 Stunning Ideas Under $50
Frame your ceremony, create the perfect photo spot, and impress your guests without spending hundreds on rentals.
Collect All Backdrop PhotosBackdrop Size Guide
Choose the right dimensions based on how you plan to use your backdrop.
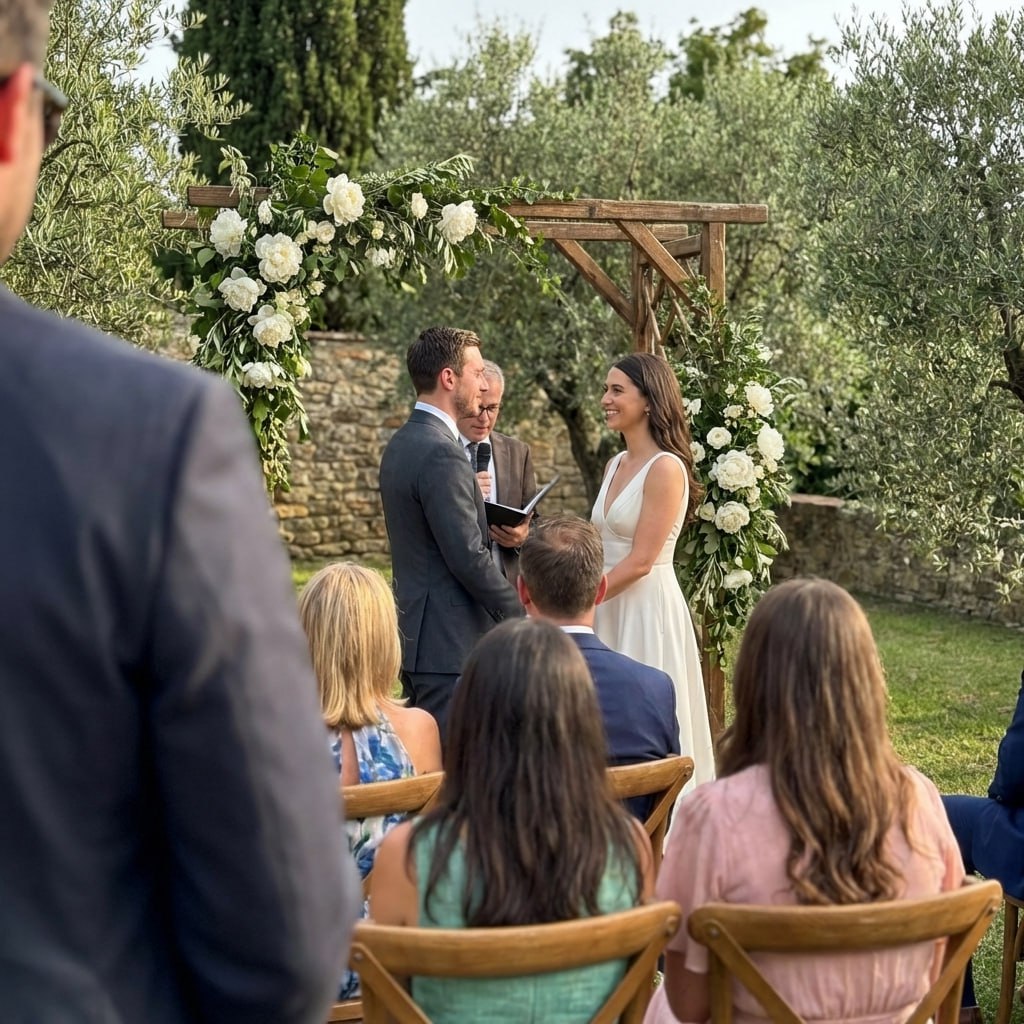
Ceremony Backdrop
Frames the couple plus officiant. Wider is better for wide-angle ceremony shots.
Photo Booth
Fits 3-4 people standing. Leave 3 ft of clear space in front for posing.
Sweetheart Table
Sits behind the couple's table. Does not need to be full height since the table hides the bottom.
Dessert Table
Shorter backdrop that highlights the dessert display without overwhelming it.
12 DIY Backdrop Ideas With Instructions
1. Fabric Draping Backdrop
Materials: PVC pipe frame or curtain rod, sheer fabric (tulle, chiffon, or muslin), zip ties, fairy lights (optional)
Build a simple frame from PVC pipes. Drape fabric over the top bar, creating gentle swags. Secure with zip ties at intervals. Layer 2 to 3 fabric panels for depth. Add fairy lights behind the fabric for a dreamy glow effect.
Pro tip: Buy fabric from the clearance section or use inexpensive bed sheets. King-size flat sheets in white or ivory work surprisingly well.
2. String Light Curtain
Materials: 3-4 curtain string light strands (300 lights), curtain rod or pipe, hooks, extension cord with timer
Mount a rod or pipe horizontally at 7 feet high. Hang string light curtain strands side by side to create a wall of warm light. Set on a timer to turn on 30 minutes before the ceremony. Works indoors or outdoors.
Pro tip: Warm white lights (2700K) create the most flattering skin tones in photos. Avoid cool white or multicolor for wedding backdrops.
3. Paper Flower Wall
Materials: Cardstock in wedding colors (50-80 sheets), hot glue, scissors, foam board or chicken wire backing, templates (free printable)
Cut paper flowers in 3 sizes (small 4 inch, medium 8 inch, large 12 inch) using free templates. Curl petals for dimension. Start with a backing (foam board or chicken wire on a frame). Hot glue largest flowers first in a scattered pattern, then fill gaps with medium and small flowers.
Pro tip: Recruit 2 to 3 helpers for the flower cutting and assembly. Turn it into a crafting party with snacks and music. One person can make about 10 large flowers per hour.
4. Greenery Wall
Materials: Chicken wire on a wooden frame, zip ties, faux greenery garlands (6-8), fresh eucalyptus bunches (optional), floral wire
Build a frame from 1x2 lumber or PVC. Staple chicken wire across the front. Weave faux greenery garlands through the chicken wire, starting from the top. Fill gaps with additional greenery using floral wire. Add fresh eucalyptus for scent and texture.
Pro tip: Faux greenery garlands from craft stores look incredibly realistic and can be reused. Buy during a 40 percent off sale for maximum savings.
5. Ribbon Wall
Materials: Satin or grosgrain ribbon in 3-4 coordinating colors (200+ yards total), dowel or pipe, scissors
Cut ribbons to floor length plus 6 inches. Tie each ribbon to the horizontal rod, alternating colors. Space ribbons 1 to 2 inches apart for a flowing curtain effect. Trim the bottoms to an even length or at an angle for a modern look.
Pro tip: Mix ribbon widths (1/4 inch, 1/2 inch, and 1 inch) for visual texture. Include some sheer organza ribbons among the satin for depth.
6. Balloon Garland Arch
Materials: Balloons in wedding colors (100-150), balloon strip tape, hand pump, fishing line, command hooks or stand
Inflate balloons in 3 sizes (5 inch, 11 inch, and 16 inch). Thread through balloon strip tape, alternating sizes. Shape into an arch and secure to a stand or wall. Fill gaps with small balloons. Add greenery sprigs between balloons for an organic touch.
Pro tip: Inflate balloons the morning of the event (not the night before). Use high-quality latex balloons that hold air longer. Avoid direct sunlight which pops balloons faster.
7. Macrame Wall Hanging Backdrop
Materials: Cotton macrame cord (3-4mm, 8-10 rolls), a wooden dowel or driftwood branch, scissors, comb for fringe
Cut cord into doubled lengths of about 10 feet and mount each strand to the dowel using a lark's head knot. Work basic macrame patterns (square knots, spiral knots) across a few rows near the top, then let the rest hang loose as fringe. Comb out the bottom ends for a soft, feathered look.
Pro tip: You do not need advanced macrame skills. A dowel covered mostly in straight hanging cord with just one or two knotted rows near the top still reads as intentional and boho in photos.
8. Wood Pallet Wall
Materials: 4-6 wood pallets (often free from hardware or garden stores), sandpaper, wood stain or paint (optional), screws or zip ties to join panels
Sand down rough or splintering edges on each pallet. Stand pallets side by side and join them with screws or heavy-duty zip ties on the back. Prop the wall against sawhorses or a simple A-frame support, or lean it against a sturdy wall or fence. Stain or leave natural depending on your color palette.
Pro tip: Ask local hardware stores, garden centers, or moving companies if they have pallets to give away. Many will hand them over for free if you ask a week or two ahead.
9. Streamer Fringe Curtain
Materials: Crepe paper streamer rolls in 3-4 colors, a horizontal rod or string, tape or a stapler
Cut streamers into lengths of floor height plus a few inches. Tape or staple them in tight, overlapping rows along the rod so no gaps show through. Alternate colors in a pattern (solid blocks, ombre, or fully random) depending on your theme. Trim the bottom evenly once hung.
Pro tip: Crepe paper crinkles naturally as it hangs, which gives more visual texture than flat ribbon for a fraction of the cost. Avoid setting it up in rain or high humidity, since crepe paper colors can bleed when wet.
10. Giant Hoop Backdrop
Materials: A large metal or wood hoop (hula hoop works, or a macrame ring from a craft store), fabric or greenery garland, floral wire, a stand or hanging point
Wrap the hoop in fabric strips or drape sheer fabric across the top third. Attach a greenery garland or a cluster of flowers along one side using floral wire, leaving the rest of the hoop open. Suspend from a stand, tripod, or ceiling hook so the couple stands centered inside it.
Pro tip: A single asymmetric floral cluster (rather than flowers wrapped all the way around) uses far less material and photographs just as well, since most shots only capture one side of the hoop.
11. Paper Pom-Pom Cluster Backdrop
Materials: Tissue paper in 2-3 wedding colors, wire or string for hanging, scissors
Fold stacks of 8-10 tissue paper sheets accordion-style, then round the edges and tie the center tightly with wire. Fluff each layer outward to form a pom-pom, alternating sizes from 6 to 16 inches. Hang the pom-poms at varying heights from a horizontal string or directly against a plain wall using removable hooks.
Pro tip: Make pom-poms a week or two ahead and store them flat until the day of the wedding. They only take a minute to fluff back into shape once you arrive.
Rental vs DIY Cost Comparison
Installation and Setup Tips
Measure Your Space First
Visit the venue and measure the exact wall or area where your backdrop will go. Note ceiling height, available floor space, and any obstacles like outlets or windows.
Build a PVC Frame
A simple PVC pipe frame (2 vertical pipes + 1 horizontal) costs $10 to $15 and supports most backdrop styles. Fill the base buckets with sand or concrete for stability.
Test Wind if Outdoors
Set up your backdrop outdoors a few days before to test wind resistance. Add weights to the base and extra securing points. Have a backup indoor location ready.
Test Photography
Take test photos with your phone at the setup location. Check for shadows, reflections, and whether the backdrop fills the frame properly at normal photo distances.
Bring a Repair Kit
Pack extra supplies on the wedding day: hot glue gun, zip ties, scissors, tape, extra fabric/flowers, and fishing line. Quick fixes are invisible in photos.
Assign a Setup Person
Delegate backdrop setup to a trusted friend or family member. Create a photo guide showing exactly how it should look so they can replicate it without you being there.
Which Backdrop Fits Your Venue and Style
Match the backdrop to your setting rather than picking whatever looks nicest on Pinterest. The wrong backdrop for the space fights the venue instead of complementing it.
Barn or rustic outdoor venue
Wood pallet wall or greenery wall
These read as intentional against exposed wood, hay bales, and string lights rather than clashing with the setting.
Modern indoor hotel ballroom
Fabric draping or ribbon wall
Clean lines and sheer fabric photograph well against neutral walls without competing with existing chandeliers or decor.
Backyard or garden ceremony
Giant hoop backdrop or macrame wall hanging
Boho textures pair naturally with an already-green setting and do not require a fully opaque background.
Beach or waterfront ceremony
String light curtain or streamer fringe
Lightweight materials handle ocean breeze better than heavy fabric panels, which can billow or blow over.
Small or tight indoor space (under 10 ft ceiling)
Paper pom-pom cluster or paper flower wall
Flat, wall-mounted options do not eat up floor space the way a freestanding frame or arch does.
Colorful or maximalist theme
Balloon garland arch or streamer fringe curtain
These two styles handle bold, multi-color palettes better than neutral fabric or greenery, which tend to look best in one or two tones.
6 Mistakes That Make a DIY Backdrop Look Cheap
A budget backdrop does not have to look budget. These are the details that separate a polished result from an obviously homemade one.
Set up your backdrop fully assembled at least once before the wedding day, ideally at the actual venue or a space with similar dimensions. Many backdrops that look fine flat on the floor sag, lean, or gap once vertical.
A backdrop with visible gaps between flowers, greenery, or fabric reads as unfinished in photos. Overfill slightly rather than spacing materials evenly and running short.
A wobbly frame is the fastest way to make a backdrop look unsafe and amateurish, and it shows up in every photo taken in front of it. Weight the base properly, whether that means concrete-filled buckets, sandbags, or a stable A-frame.
A backdrop that fights the existing wall color, flooring, or lighting draws the eye for the wrong reason. Bring a paint chip or fabric swatch from your palette when you scout the space.
Paper flower walls and pom-pom clusters take real hours to assemble. Start these at least 2 to 3 weeks out and spread the work across a few sessions rather than one long night before the wedding.
Take a test photo from the actual distance and angle guests and photographers will use. Some textures that look great up close (thin ribbon, small paper details) flatten out and disappear in wider shots.
Quick Backdrop Glossary
Terms you will run into while shopping for materials or reading other backdrop tutorials.
Lark's head knot
The basic knot used to mount macrame cord onto a dowel or ring. It is the first knot to learn if you are trying macrame for the first time.
Balloon strip tape
A pre-punched plastic strip you thread inflated balloons through to build a garland or arch without individually tying each one.
Floral wire
Thin, bendable wire used to attach greenery, flowers, or fabric to a frame, chicken wire, or hoop securely.
Chicken wire backing
A wire mesh panel stretched across a frame that gives paper flowers, greenery, or other materials something to be woven into or glued onto.
A-frame support
A simple triangular stand built from two angled legs, used to hold a freestanding backdrop upright without needing to lean it against a wall.
Ombre effect
A gradual color transition from light to dark (or one hue to another) across a backdrop, commonly used with ribbon, streamers, or balloon garlands.
The One-Time Frame: Build It Once, Reuse It Twice
Most of the ideas above only need one of two basic frames. Build the frame once and you can swap the fabric, flowers, or greenery for the ceremony versus the reception without buying new hardware.
Freestanding PVC Frame
Works for fabric draping, ribbon walls, string lights, macrame, and streamer curtains.
- 2 vertical PVC pipes (8-9 ft each)
- 1 horizontal PVC pipe (8-10 ft) or a length of copper pipe
- T-joint or elbow connectors for the top corners
- 2 five-gallon buckets filled with sand or quick-set concrete
- Zip ties or gaff tape for attaching materials
Wall-Mounted Panel Frame
Works for paper flower walls, greenery walls, pom-pom clusters, and chicken-wire-backed designs.
- 1x2 lumber cut into a rectangle frame (roughly 7 x 7 ft)
- Wood screws or a staple gun for joining corners
- Chicken wire or foam board sized to the frame
- Command Strips rated for at least 5 lbs each, or hooks if the venue allows drilling
- Extra zip ties for reinforcing heavier sections
General DIY event decor guides, including The Knot's DIY wedding decor roundup confirm the same core principle: a sturdy, reusable frame is what separates a backdrop that survives setup and transport from one that has to be rebuilt from scratch for every event.
Weatherproofing an Outdoor Backdrop
Outdoor ceremonies add a variable most indoor guides skip entirely: wind, sun, and moisture. Build these into your plan from the start rather than reacting on the day.
Wind
Lightweight materials like sheer fabric, streamers, and balloons catch wind the most. Weight the base with sandbags or concrete-filled buckets, and add a second anchor point (tent stakes, guy lines, or a heavier back panel) for anything over 6 feet tall. Avoid setting up more than a couple of hours before the ceremony if wind is in the forecast.
Direct Sun
Crepe paper, tissue paper, and some fabric dyes can fade or bleed color after hours in direct sun. If your ceremony is scheduled for midday, assemble delicate paper elements as close to start time as possible rather than the night before.
Rain or Humidity
Paper-based backdrops (pom-poms, paper flowers, streamers) are the most vulnerable to moisture. Have an indoor backup plan or a simple tent/canopy ready, and keep the backdrop stored indoors until the last possible moment before guests arrive.
Backup plan rule of thumb: if your venue has any indoor space at all, however small, confirm with your coordinator that it can serve as a fallback location the morning of the wedding. Most weather-related backdrop failures happen not because the plan was wrong, but because there was no fallback location decided in advance.
Watch: A Simple DIY Backdrop Walkthrough
Seeing a backdrop assembled start to finish makes the frame-and-drape process much clearer than instructions alone. This beginner-friendly video walks through building a basic backdrop step by step.
Watch on YouTubeMore DIY Wedding Ideas
First dance
You guys!!
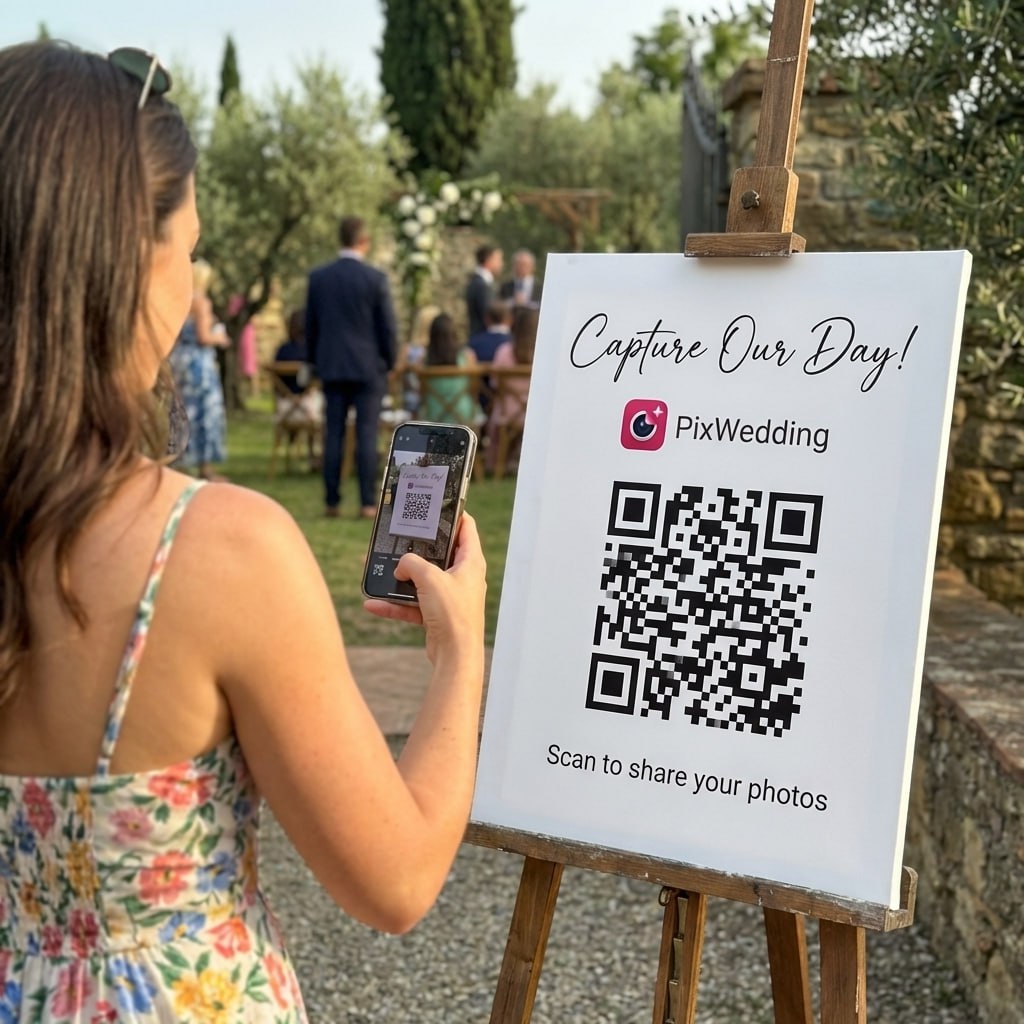
Backdrop built - now capture every photo in front of it.
You made the perfect backdrop. Make sure every guest photo in front of it ends up in one shared album, not scattered across 50 phones.
From Mom
Scan to join the album
No app, no account
UPLOADING
Saving your moment
THE ALBUM
Emma & Jack
June 21, 2026
647 photos · 95 guests
SCAN TO TRY
pix.wedding/
your-wedding
Why Every Wedding Needs a Backdrop
A backdrop serves triple duty at a wedding: it frames the ceremony, provides a photo-worthy background for portraits, and can be repurposed for the reception. Professional backdrop rentals cost $300 to $1,500, making DIY one of the highest-impact budget saves you can make.
Backdrops also photograph beautifully, giving your professional photos a polished, intentional look. They hide unattractive venue walls, create visual depth, and give guests an obvious spot for selfies and group shots throughout the event.
- •Professional backdrop rentals cost $300-$1,500; DIY versions cost $10-$50
- •Backdrops frame ceremony photos and create Instagram-worthy backgrounds
- •Repurpose your ceremony backdrop as a reception photo booth
- •DIY backdrops can be customized to match any theme or color palette
- •Many backdrop styles require zero crafting experience
Backdrop Placement and Lighting Tips
The placement of your backdrop matters as much as the design. For ceremony backdrops, position it so natural light comes from behind the photographer (facing the backdrop), not from behind the backdrop which creates silhouettes. For photo booths, add two simple clip lights angled at 45 degrees for flattering portraits.
Consider the time of day when choosing materials. Sheer fabrics look magical with backlighting at golden hour but can appear washed out in harsh midday sun. Solid materials and dimensional elements (flowers, balloons, greenery) work well in any lighting condition.
How Much of Your Decor Budget Should Go to the Backdrop
The Knot puts the average decor allocation (which covers flowers, lighting, signage, and non-floral elements together) at roughly 9% of the total wedding budget, with the backdrop being one line item inside that category alongside centerpieces, ceremony florals, and reception styling. A DIY backdrop costing $20 to $50 instead of a $300 to $1,500 rental frees up a meaningful share of that decor allocation for other priorities like a florist for bouquets or better ceremony seating.
If you are working from a fixed decor budget, a reasonable split is to spend the most on whatever guests interact with directly (centerpieces, seating) and treat the backdrop as a background element that photographs well without needing to be the most expensive item in the room. A DIY backdrop under $50 usually accomplishes that without a special allocation at all.
The savings from a DIY backdrop compound with other DIY decisions. A couple who DIYs their backdrop, centerpieces, and signage can redirect several hundred dollars toward a single higher-impact splurge, whether that is a better photographer package, an extra hour of reception time, or simply a smaller, less stressful overall budget.
Decor budget percentage referenced above is from The Knot's wedding budgeting advice. Treat it as a general benchmark; actual allocation depends on your priorities and venue requirements.
Explore more free wedding tools
Everything you need to make your wedding day stress-free and unforgettable.
QR Sticker Designer
Design custom print-ready stickers.
Hashtag Generator
Create unique wedding hashtags.
How to Collect Guest Photos
5 methods ranked by participation rate and ease.
Get Photos After the Wedding
Message templates to gather guest photos post-wedding.
Share Wedding Photos with Guests
Compare every sharing platform by ease and participation.
Best Way to Get Guest Photos
The single method with the highest participation rate.
How to Make a Shared Wedding Album
Step-by-step setup for every platform.
Alternative to Disposable Cameras
Better, cheaper options than disposable cameras.
DIY Wedding Backdrop FAQ
Everything you need to know about our free tools and how they help your wedding day.
For a ceremony backdrop: 8 to 10 feet wide and 7 to 8 feet tall to frame the couple and officiant. For a photo booth backdrop: 6 to 8 feet wide and 6 to 7 feet tall. For a sweetheart table backdrop: match the table width plus 2 feet on each side. Always measure your venue space first.
Use a PVC pipe or copper pipe frame on stable bases (concrete-filled buckets work). For wall-mounted options, use Command Strips rated for the weight. Fishing line attached to ceiling hooks (if the venue allows) creates an invisible hanging system. Always confirm with your venue what is permitted.
Yes, several options can be completed in one day. Fabric draping takes 1 to 2 hours, string light curtains take 30 minutes, and ribbon walls take 2 to 3 hours. Paper flower backdrops and balloon arches require more time (4 to 8 hours) and are better spread over 2 days.
A fabric draping backdrop using clearance fabric or bedsheets costs as little as $10 to $20. String lights hung on a simple frame cost $15 to $25. A photo backdrop using printed fabric from a party supply store costs $10 to $15. The cheapest options leverage materials you may already have.
Build in sections that can be assembled on-site. Fabric backdrops fold flat for easy transport. PVC pipe frames disassemble into manageable pieces. Balloon arches should be inflated on-site. Bring zip ties, extra supplies, and a step ladder for setup.
Ideally yes, but it does not need to be an exact match. Stick to your wedding color palette and overall style (rustic, modern, romantic). Many couples repurpose the ceremony backdrop at the reception as a photo booth or sweetheart table background to get double use from one project.
Weight the base with sandbags, concrete-filled buckets, or heavy planters, and add a second anchor point with tent stakes or guy lines for anything taller than 6 feet. Lightweight materials like sheer fabric and streamers catch more wind than solid greenery or wood, so plan extra securing points for those styles.
Yes, this is one of the easiest ways to stretch a DIY budget further. Move the backdrop from the ceremony aisle to the reception space during cocktail hour and repurpose it as a photo booth, sweetheart table background, or dessert table backdrop.